In my last photography-related post: Try the Film For the First Time. I have lots of fun with negatives. This makes me want to have my own camera to experience this medium that has existed for nearly 200 years.
The film we are still using today was invented by Kodak in 1888, but photosensitive material that uses in photography can date back to 1835.
![Jonnychiwa [CC BY-SA 4.0]](https://commons.wikimedia.org/wiki/File:View_from_the_Window_at_Le_Gras_colorized_2020_new.png)
I was struggling with some electronic choices like Canon EOS 55 or Canon EOS 5 at first. But sooner, I move my attention to something big —— 120 Format and 120 camera body.
Especially after watching the video of Ji Changyuan (Bilibili: Linksphotograph), I firmed my idea of buying a Mamiya RB67.
I end up with buying a second-hand Mamiya RB67 Pro S Body with Pro SD 120 film holder with a SEKOR C 127mm f3.8 lens through Taobao during 2019 summer.
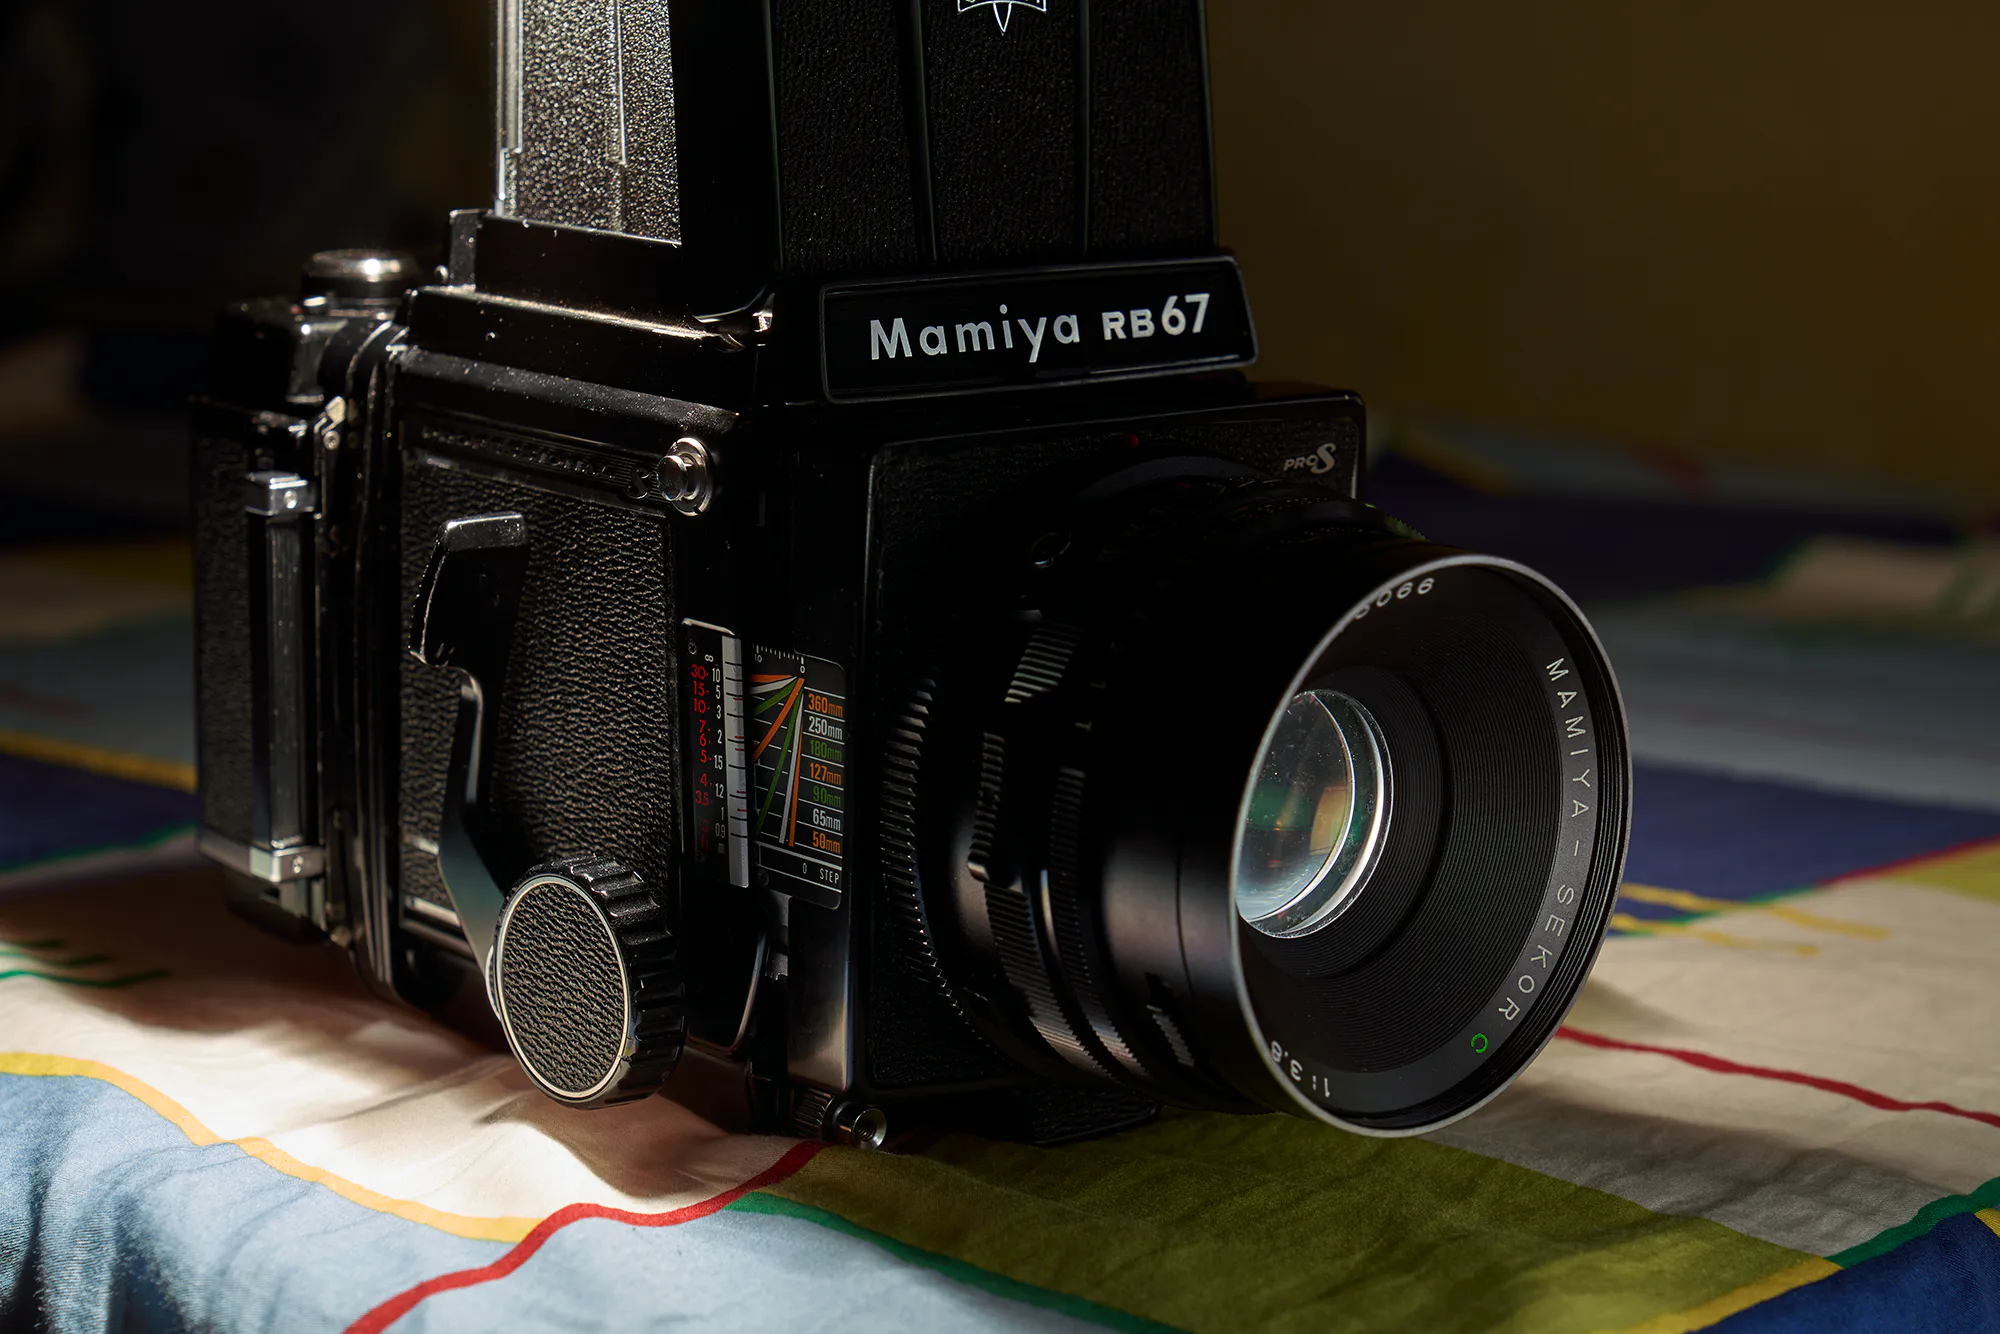
Camera Body
First Impression? Really good build quality (i.e. solid and heavy).
The whole camera is detachable design, you can remove the body, lens, waist-level viewfinder, focusing screen, adapter plate, film holder into pieces. In the past, a lot of accessories and lenses were released. This detachable design is to facilitate these accessories.
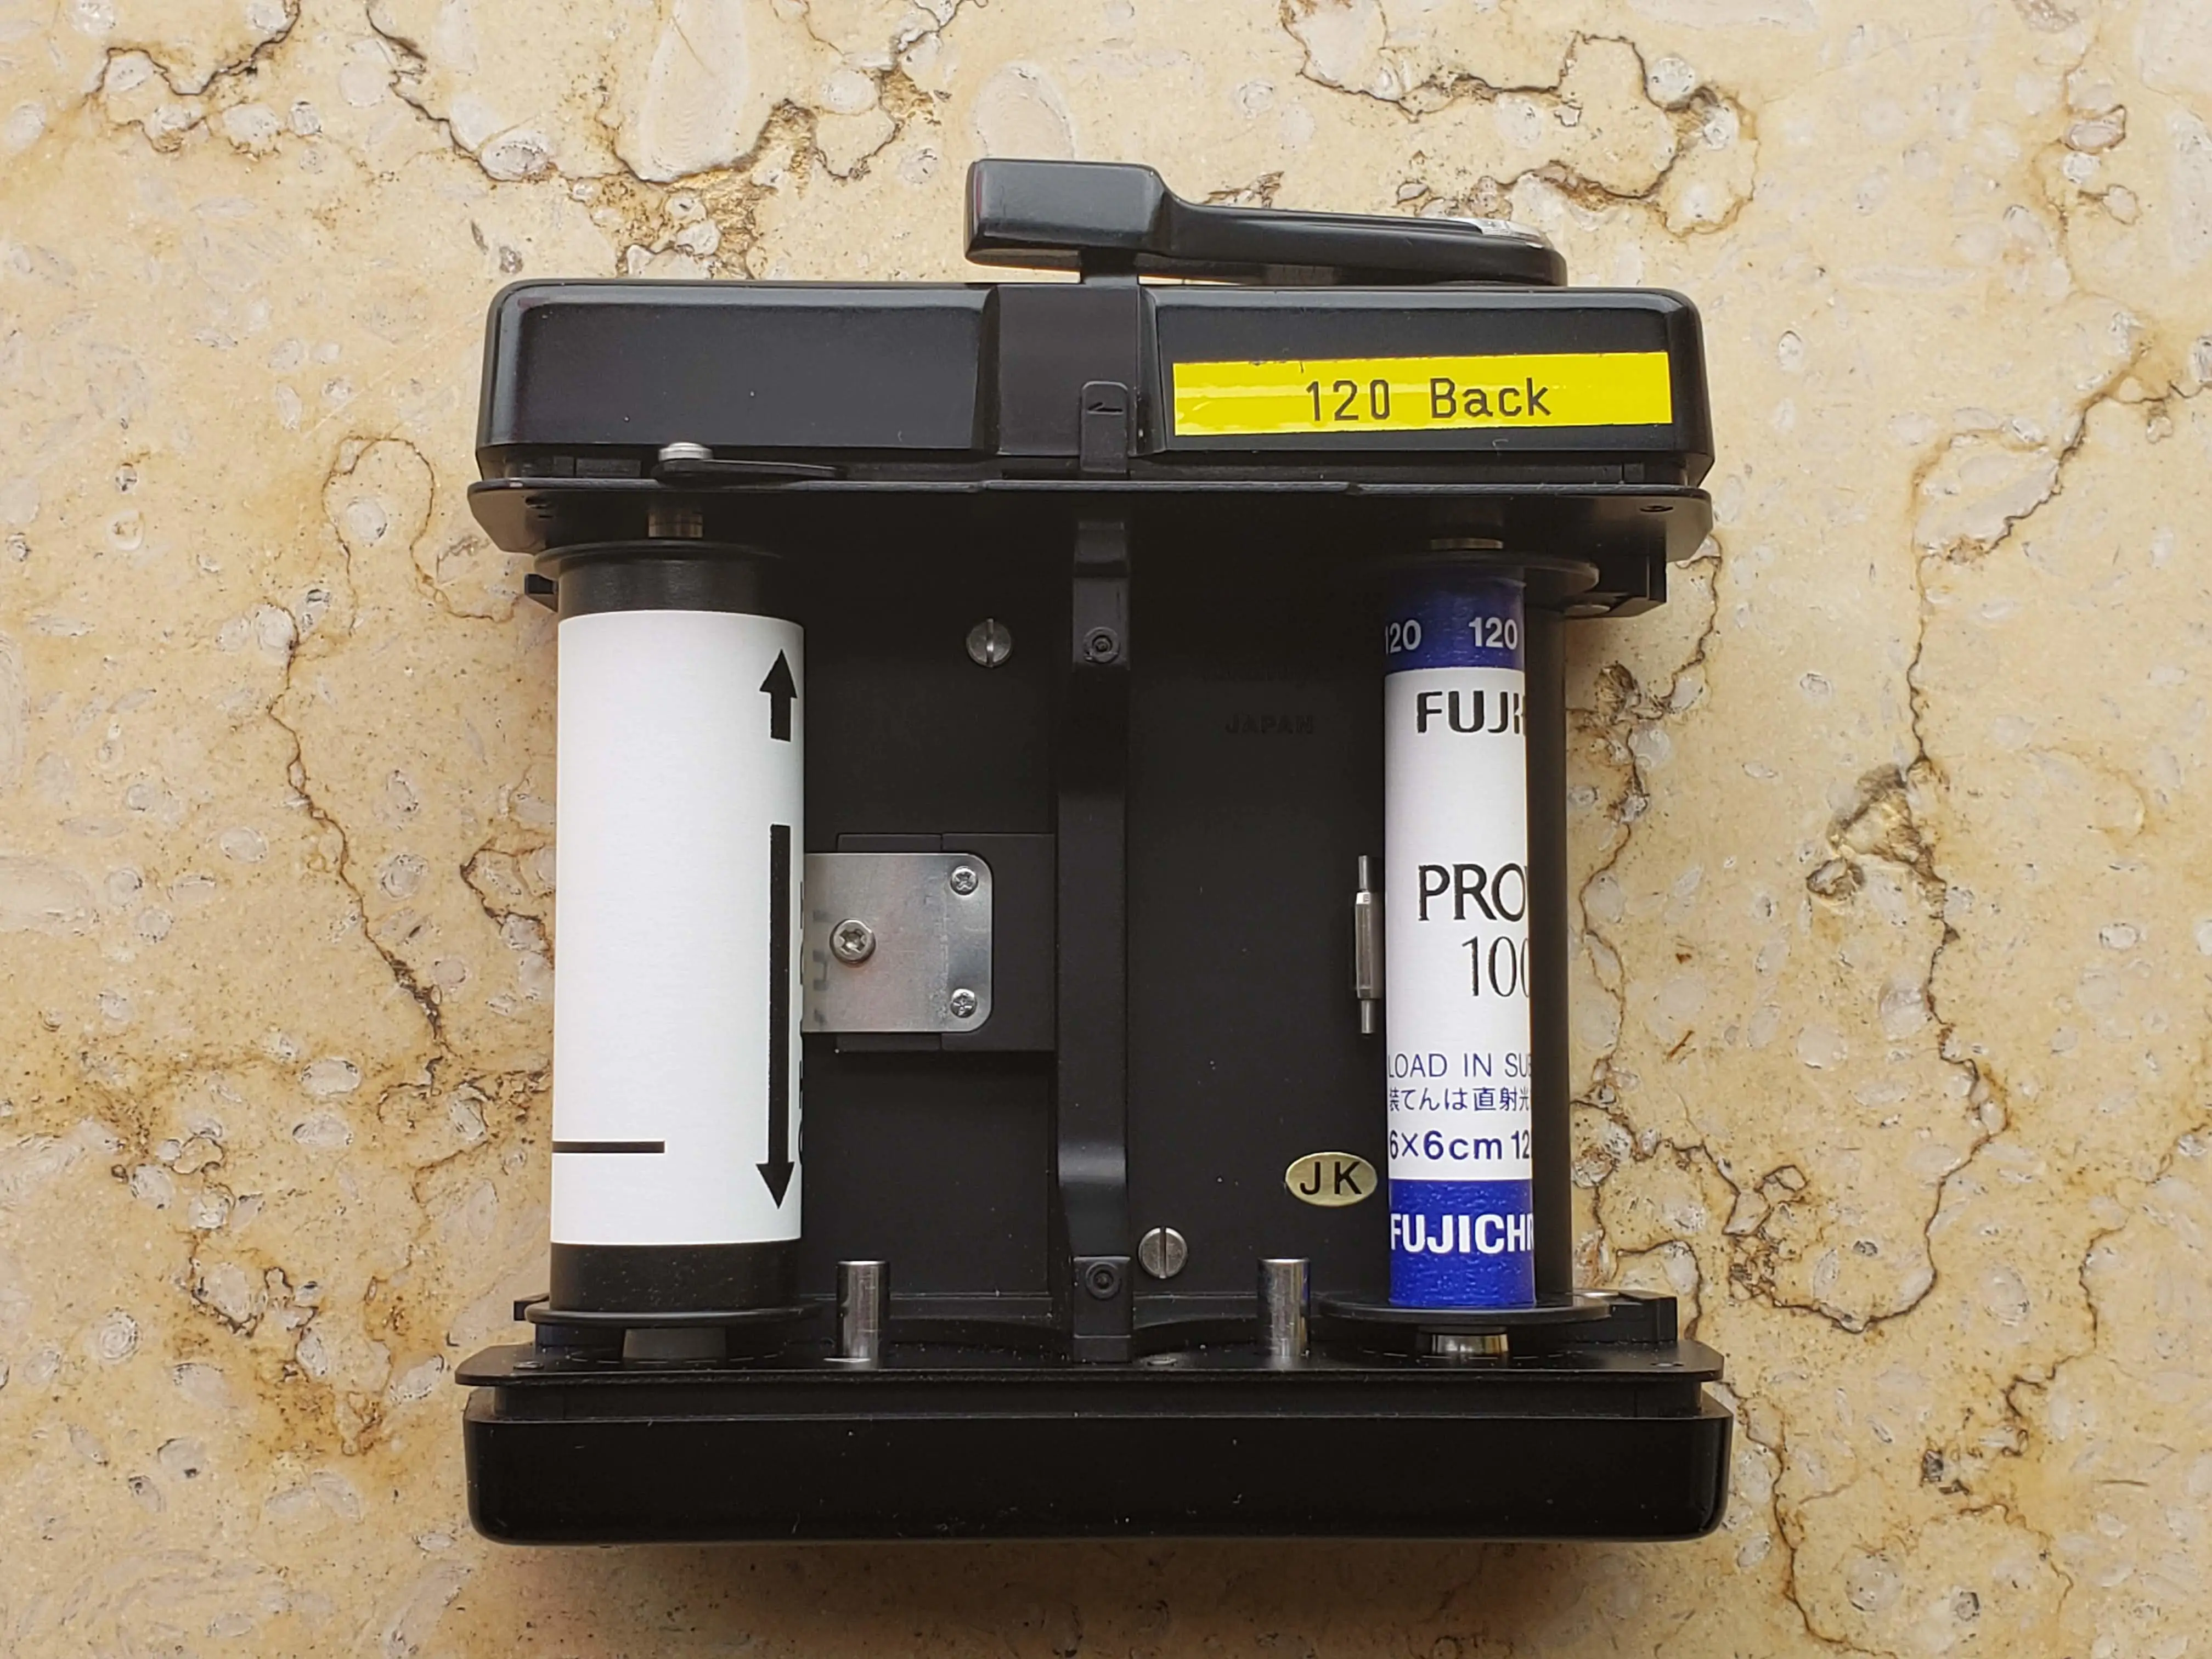
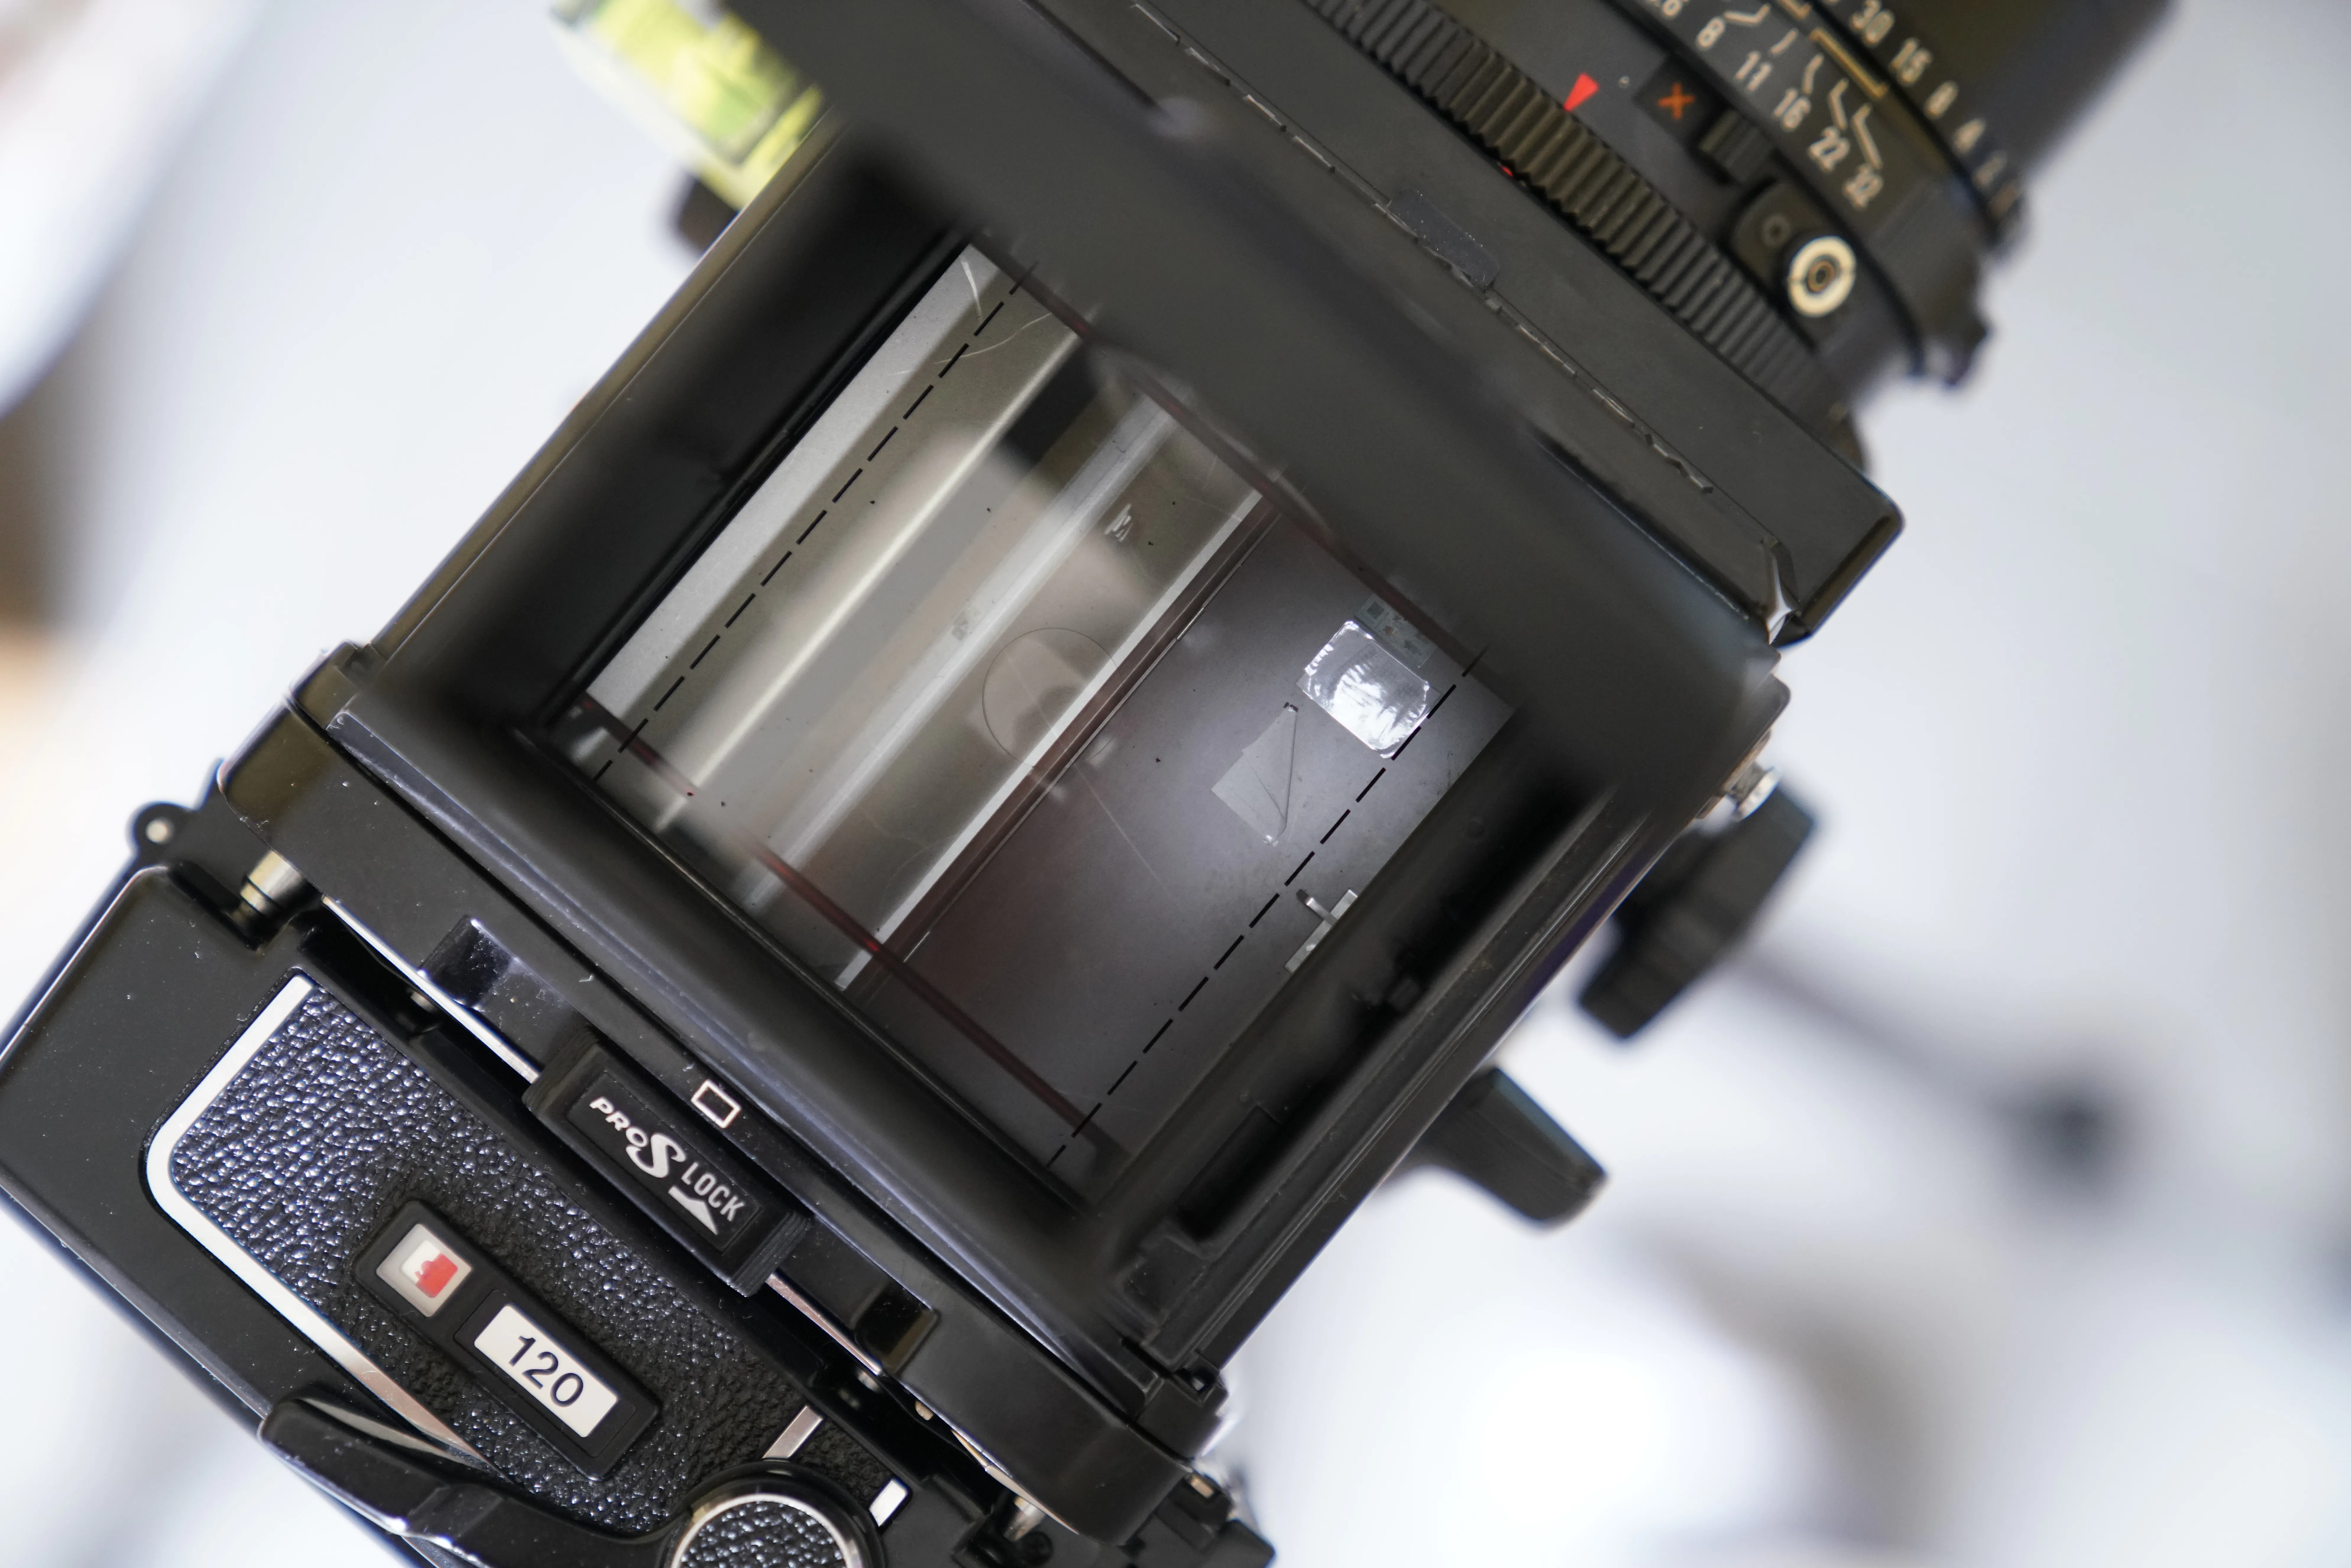
Rotating Back (Film holder)
RB in the camera name stands for “Rotating Back”, and the back I own is a 6x7 (cm) It supports other formats like 6x4.5, 6x6, 6x8, but you have to pay for these backs. (Mamiya RB67 Camera Guide - Backs) format (you can shot 10 frames with a standard rolls of 120 film). It is impractical to shoot in portrait orientation by rotating the whole camera. A camera like the Hasselblad V system is using a 6x6 format, It makes no difference with portrait or landscape orientation. Not to mention it weight way less than a Mamiya. So the adapter plate is designed to be rotatable, to easily switch between a portrait orientation or landscape orientation when shooting with this heavy camera body.
Foolproof design
The engineers include a lot of mechanisms (so call foolproof design) to make sure you didn’t mess up when you using it.
- The lens cannot unmount if the reflex mirror is not turned down. This can prevent the negative from exposure to light when the user is changing the lens.
- The shutter can’t release if the dark slide does not take off.
- The dark slide has to be slide in position if you want to remove the film holder.
- When “double exposure” is turn off on the film holder (I think only available to Pro SD back) the shutter can only release once.
- When the rotated back is not properly rotated, the shutter cannot be released.
Only the ones that impress me the most are listed, when you play with this camera yourself, you will definitely sigh how ingenious the design of this machine is.
Lens
Commonly used 35mm cameras (SLR, DSLR) use a focal-plane shutter, that is, the shutter is in front of the photosensitive material or sensor. The Mamiya RB67 don’t have a shutter inside the camera body. But relies on the leaf shutter inside the SEKOR lens produced by SEIKO A list of SEKOR lens that can use on a RB67 body, by bhphotovideo.com. Leaf shutter lens is applied in lots of medium format camera because it can easily sync with high-speed flash, and reduce camera body shake when taking the picture. Other brands systems like Hasselblad V system and Phase One XF System is also using leaf shutter lens, but their lens is generally more fancy and expensive.
The lens I got is a 127mm lens, which equivalent to a 62mm lens in 35mm format. It has a 39° angle of view and a maximum of 3.8 F-stop aperture (can adjust from F3.8~F32). This lens can give me some sharp photos or photos with bokeh. But it is too “zoomed” for me. 65mm K/L K/L lens means it can use on both RB67 PRO, RB67 PRO S, and RB67 PRO SD body also with more stable build quality. For 65mm K/L, it has a Floating Lens Elements (FLE) which can adjust to boost edge image quality. is my next “bucketlist” lens.
Pull focus
The focus ring is not on the lens, it is using a rack-and-pinion system with bellows to pull focus. The system can extend the lens and hood by turning the knobs on each side of the body and adjust the focus. This design allows focusing on something close to the camera (macro shot) for almost all lenses. But one thing needs to bear in mind, the longer the hood and bellows extended, the more light it needs to get a correct exposure.
Viewfinder
You get a waist-level viewfinder with a pop magnifier instead of an eye-level viewfinder. The world seen through it is absolutely stunning. Color is more vivid, contrast is more natural. But the shortcomings are also obvious, once the light is not sufficient,
Most of the time, the image has a fair amount of brightness.
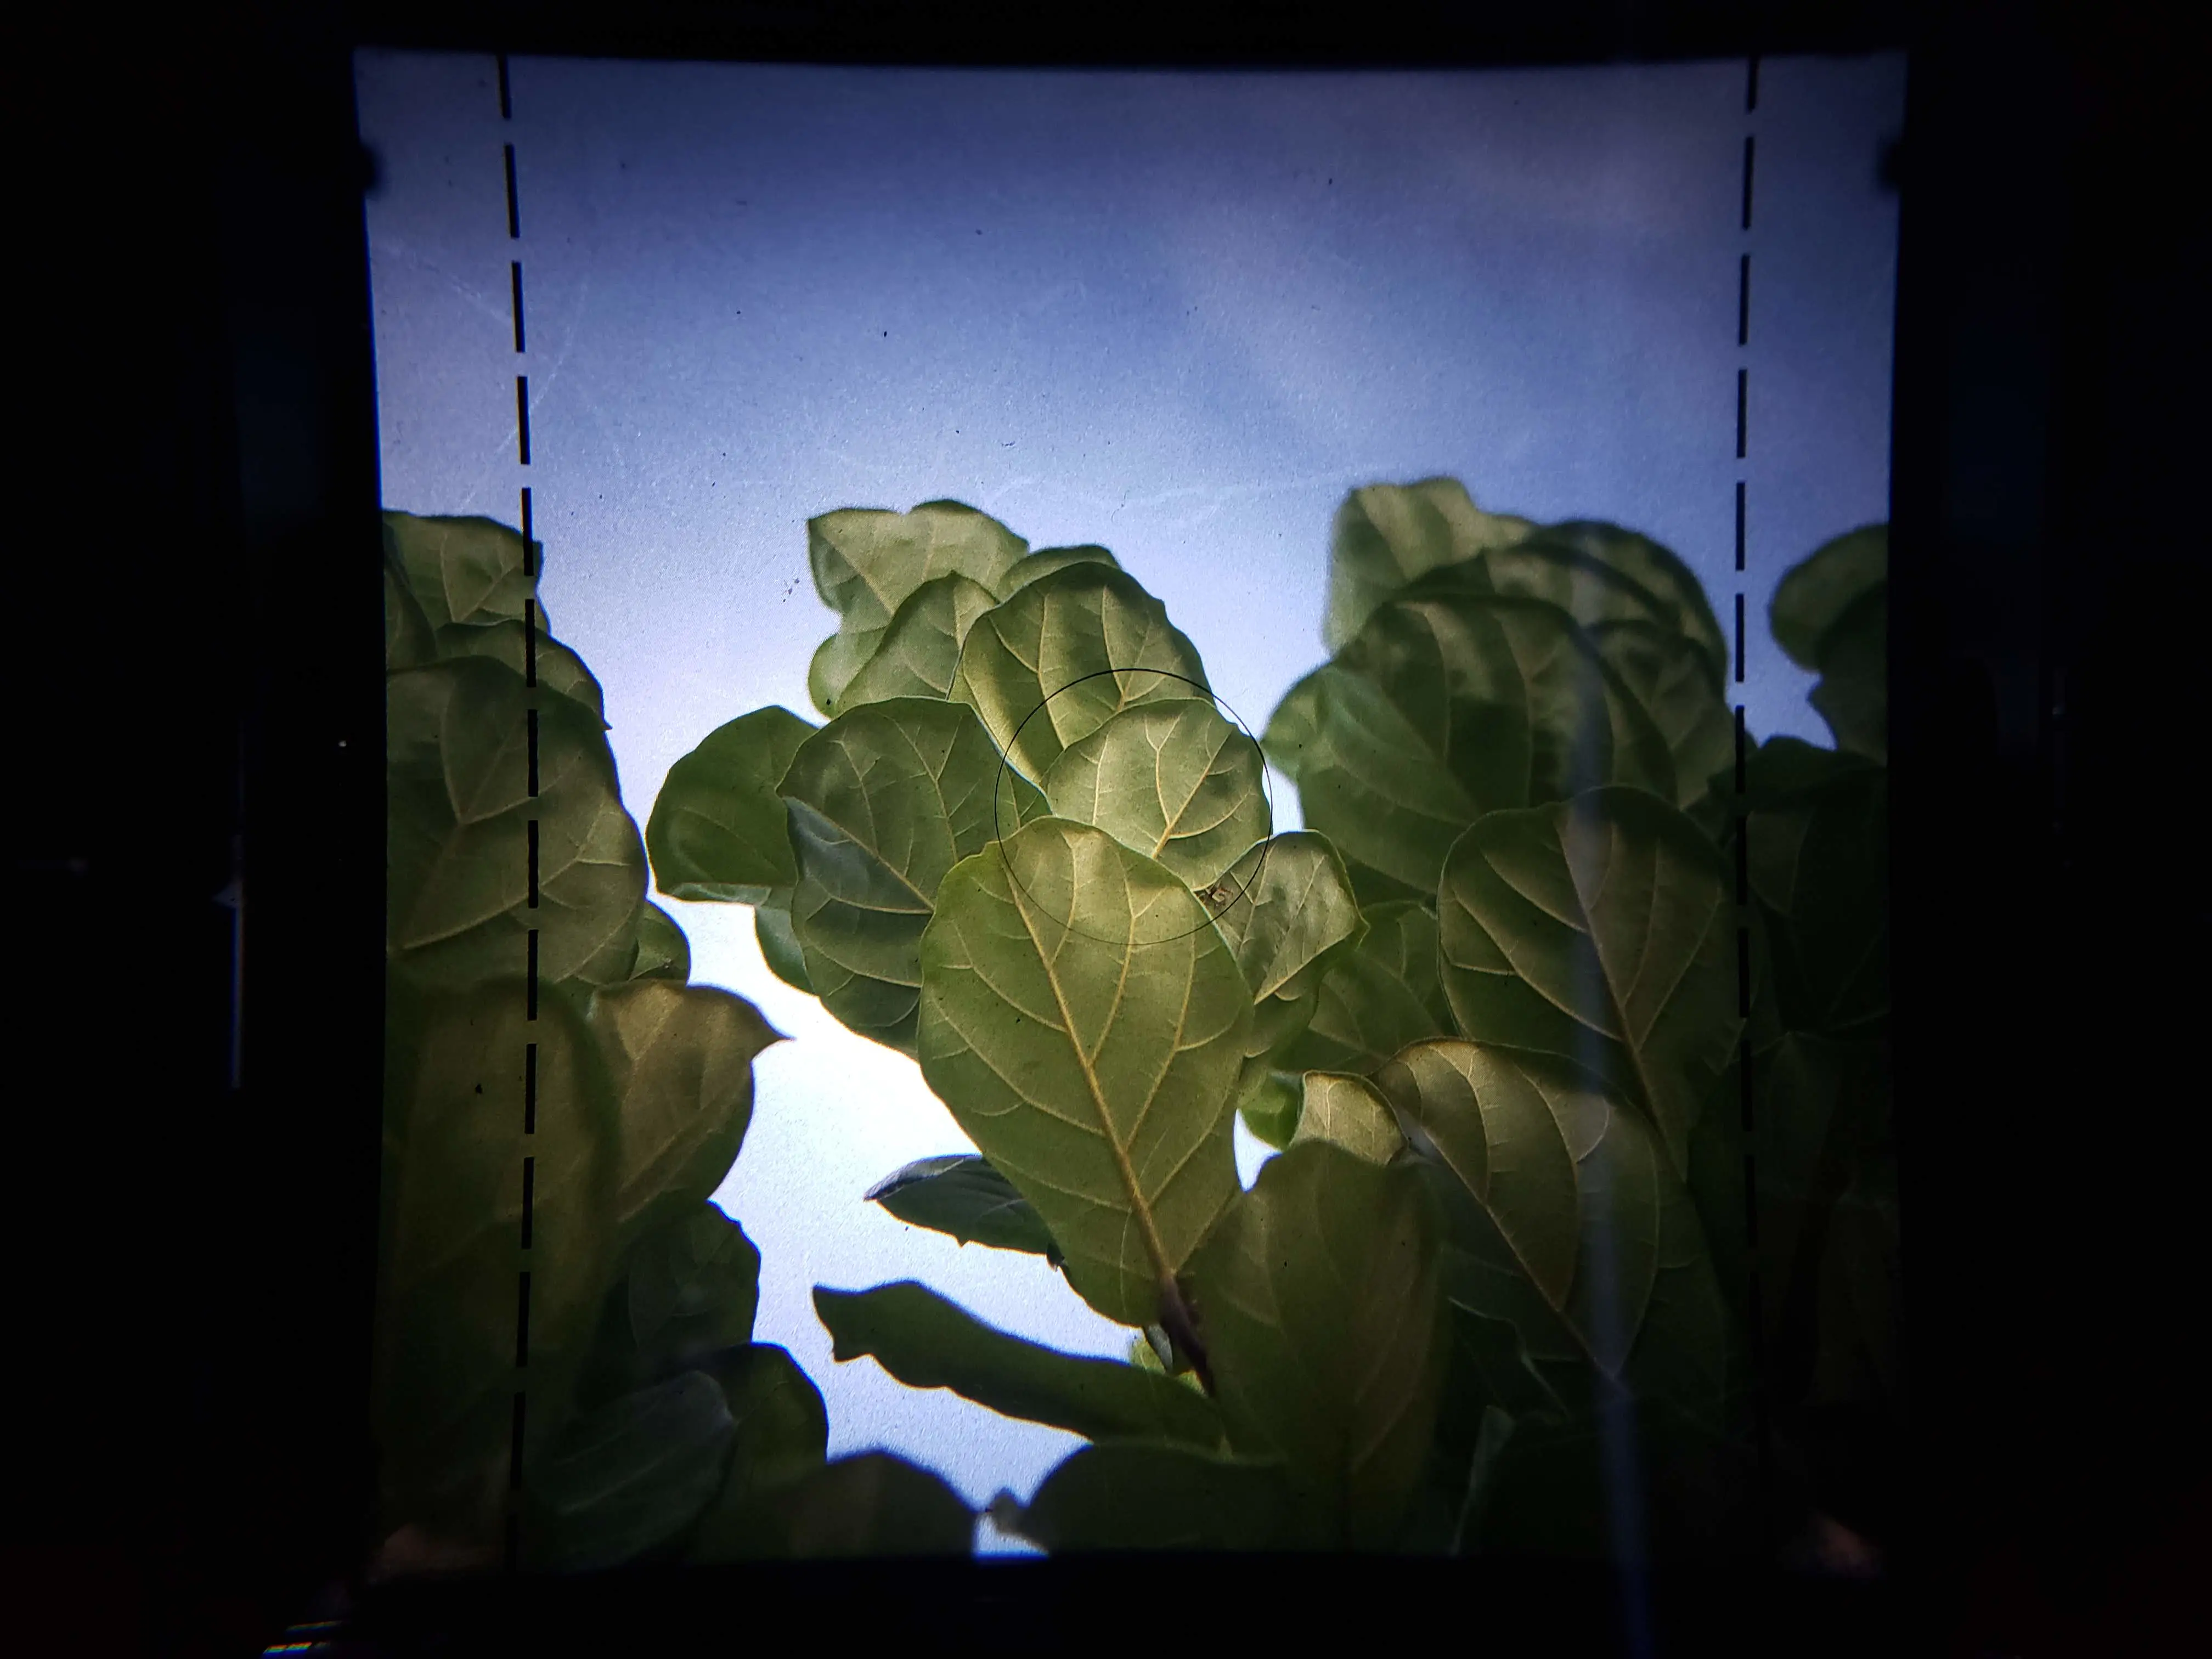
The image in the viewfinder is mirror flipped. The light has been reflected odd times. A video explained the theory. Bilibili - 苏科大物理实验 You may not get used to it at first, but soon you will get used to it and it will not be a problem when you do the composition.
The pain in the ass is, this kind of viewfinder is not usable when you doing some compositions that need to do from a high angle.
Steps to take a picture
Let me talk about how you can use such a camera. Pretty straightforward. Assume that you have a function machine, loaded with film.
- Cocking the lever of the roll film holder to advance the file if the previous film is exposed.
- Press down the shutter cocking lever.
- Make sure the lens cap is removed, raising the focusing hood, composite, and pull focus.
- Pull out the dark slide.
- Setting the shutter speed and the aperture.
- Try to keep steady and press the shutter button.
Film
I have tried many kinds of negatives/films on this camera now, but there are mainly three brands: KODAK, FUJI, and ILFORD ILFORD HP5+. I also tried some SHANGHAI and FOMAPAN, but I didn’t buy those as my film stock.
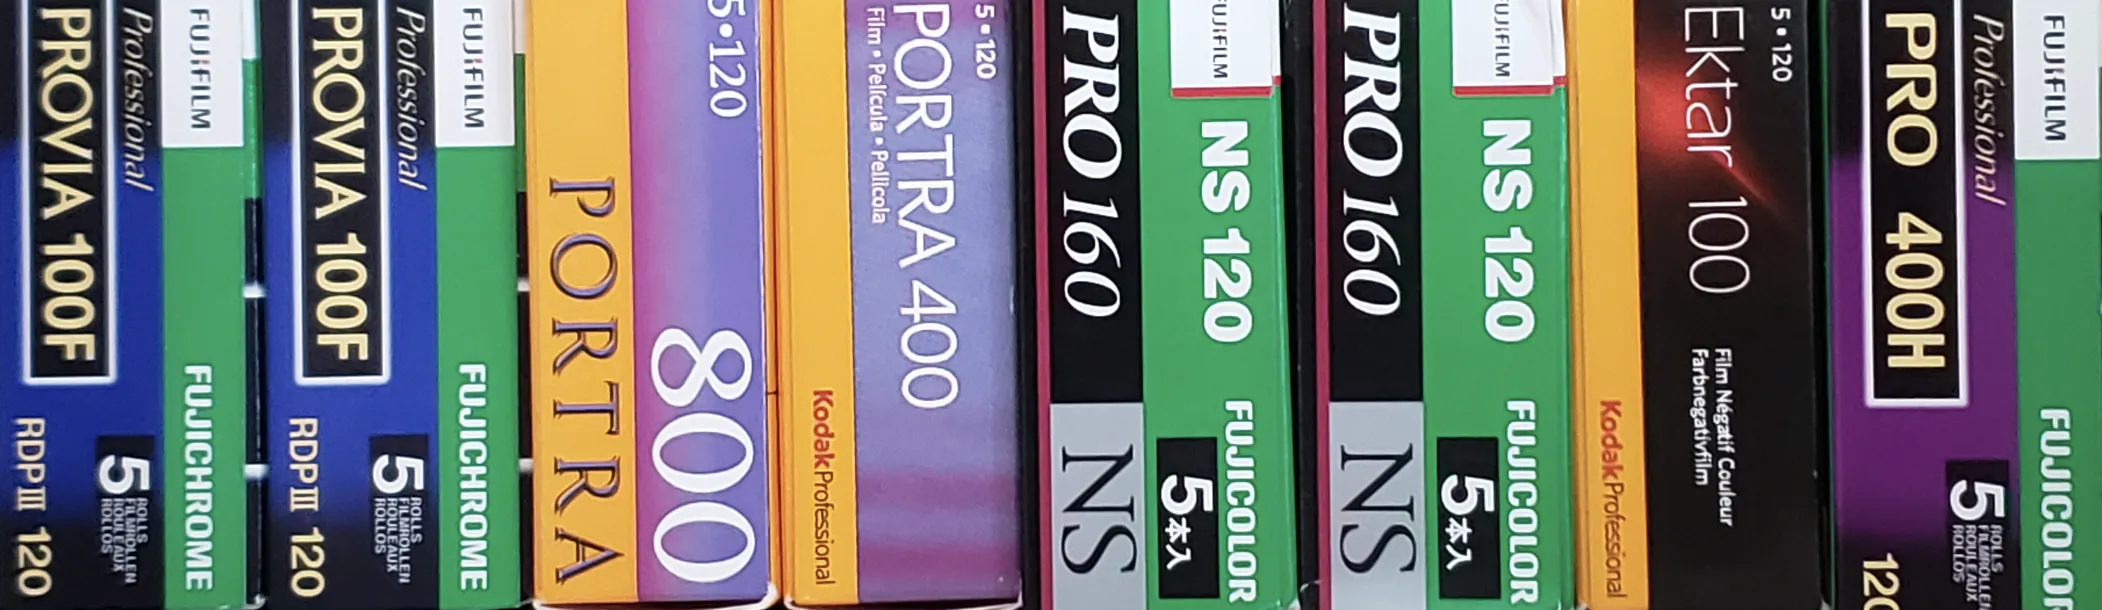
Before dive into each categories, I want to mention the design of the film. Fuji has a sticker at the end of each film roll (they call it Easy End-seal technology),
Negative film, I really like the effect of Fujifilm on green. But I also like the skin color performance of Kodak Film Portra. Ektar has a very fine grain, but you have to choose the develop lab wisely.
Slide film, I only tried RDP III. The lab I chose didn’t give me perfect results on scanned images The Hasselblad X5 Scanner may have a better result.. But from what I see from the film I get. It has a great result. Good skin tone and color.
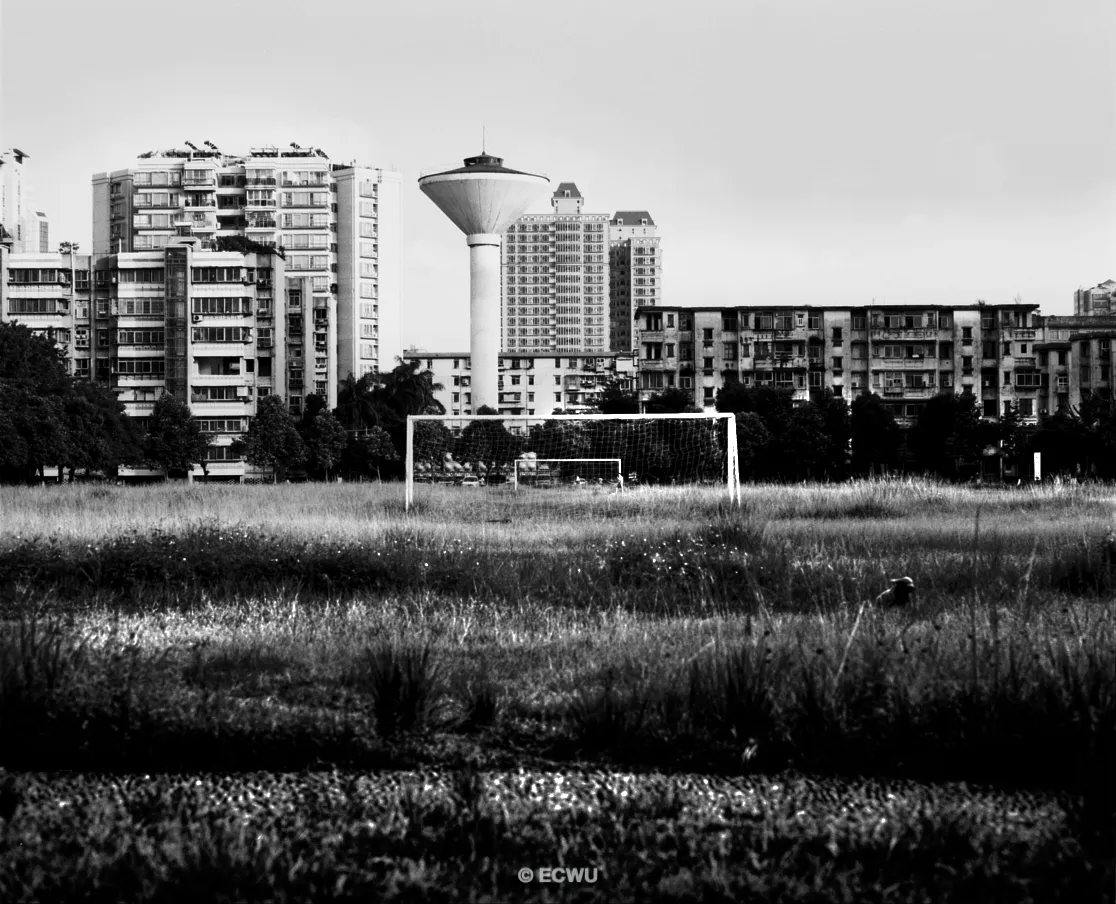
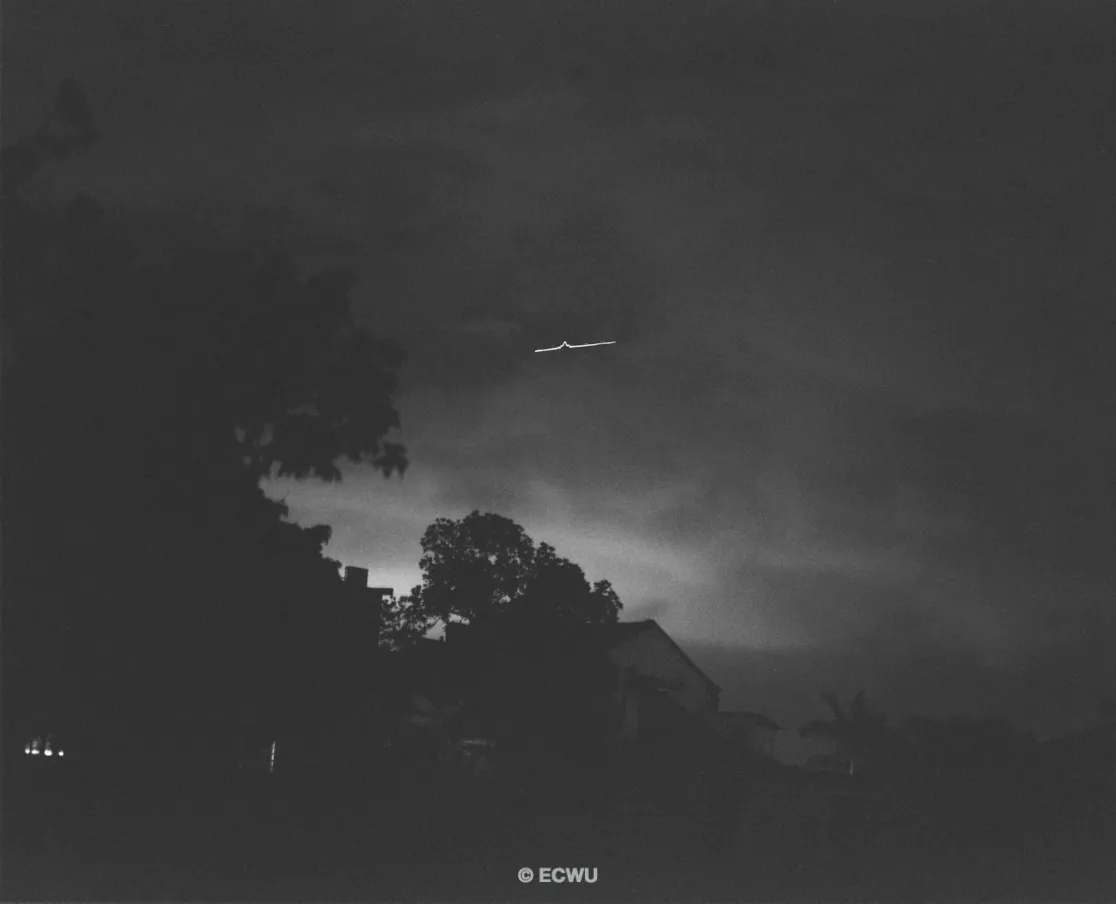
Black/White, I didn’t take too many B/W photos so I will leave this part blank for now.
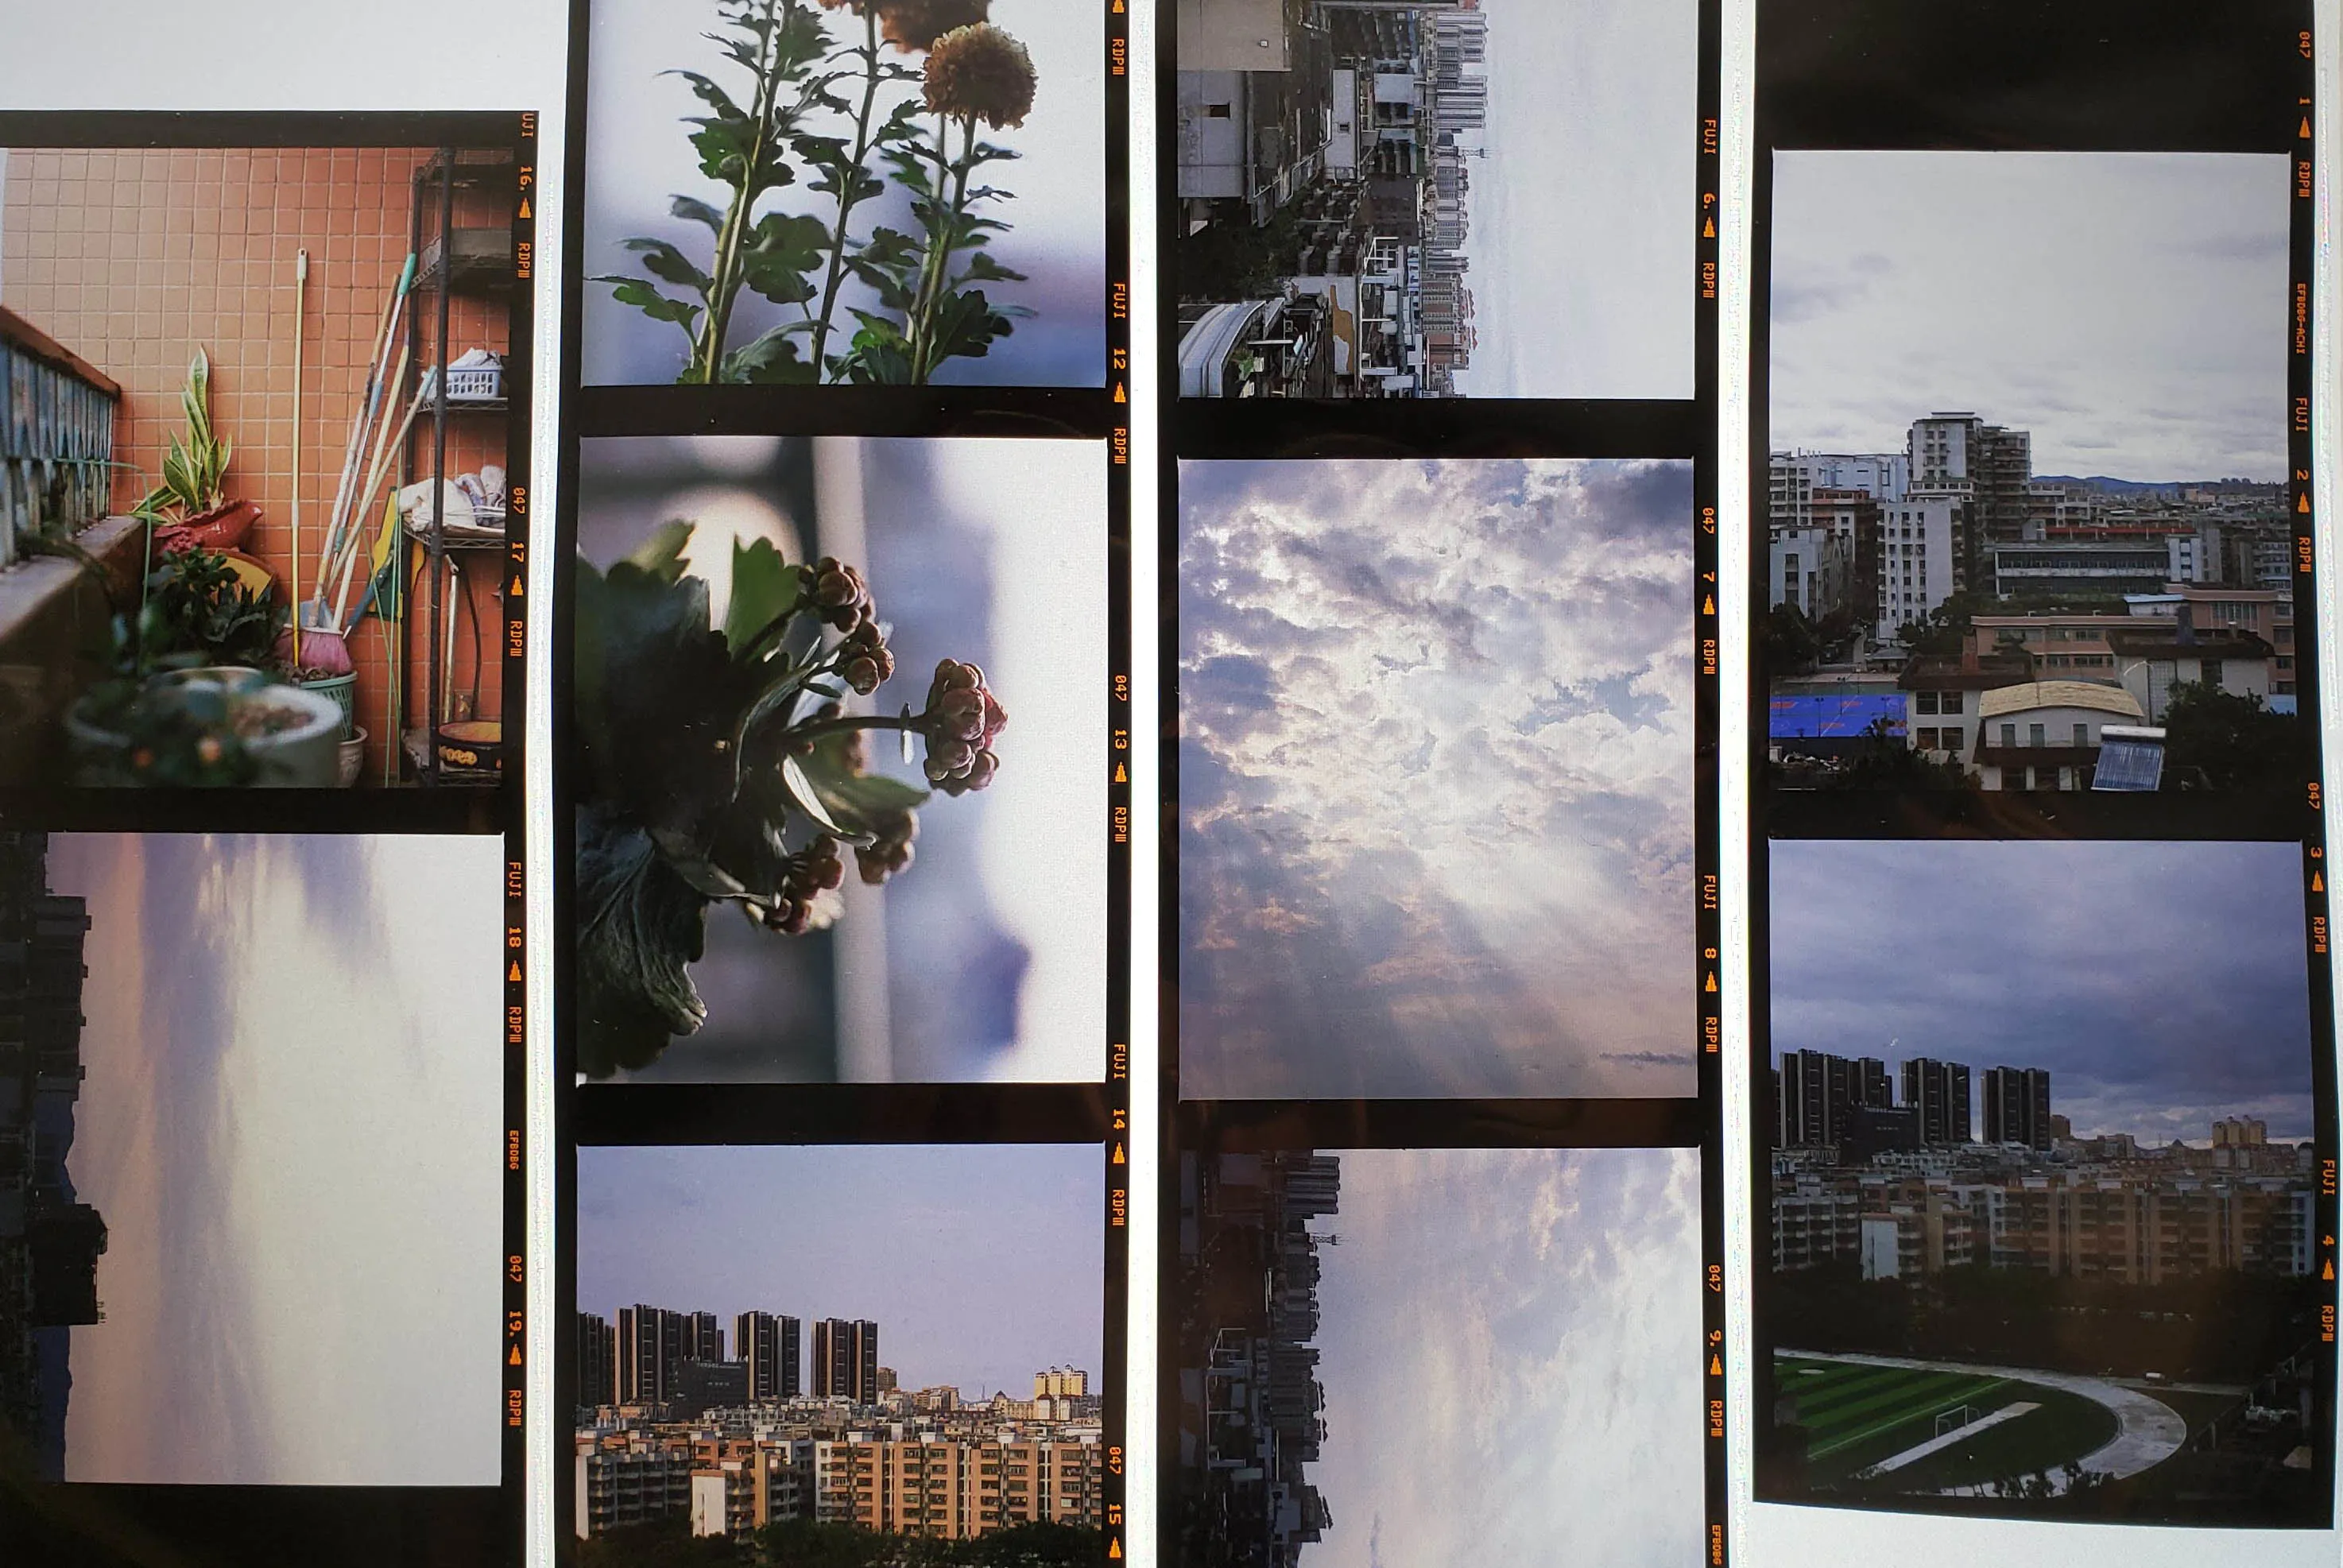
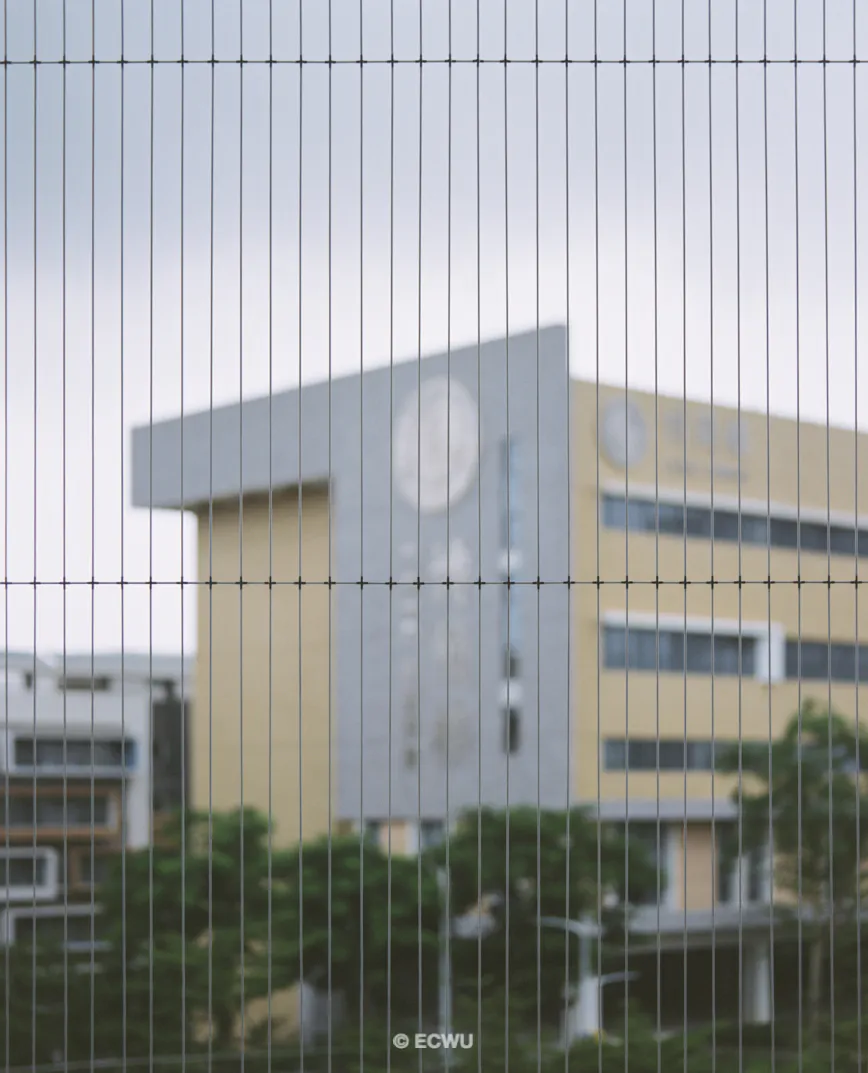
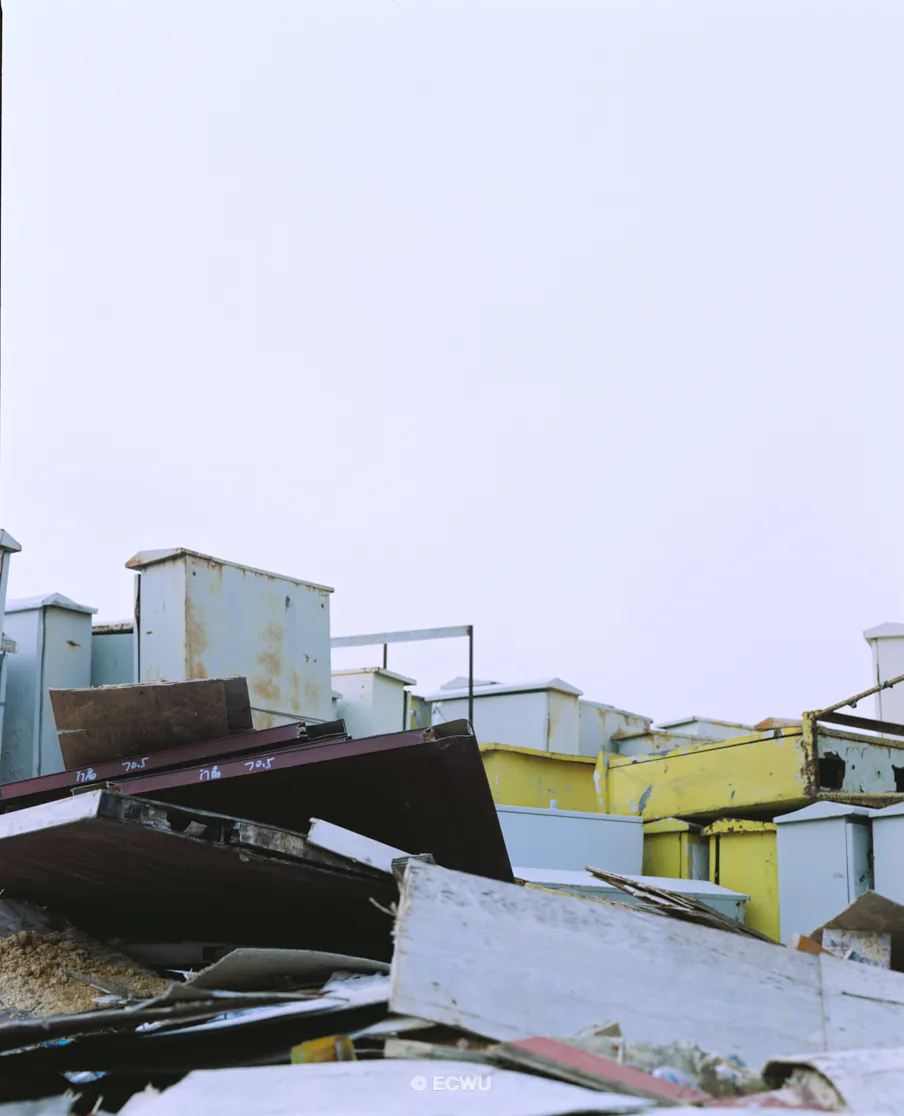
Photos shoot with this camera
Finally, I will show some of the photos I have taken, arranged according to different film types. Hope you like it.
KODAK PORTRA 400


KODAK PORTRA 160
KODAK EKTAR 100

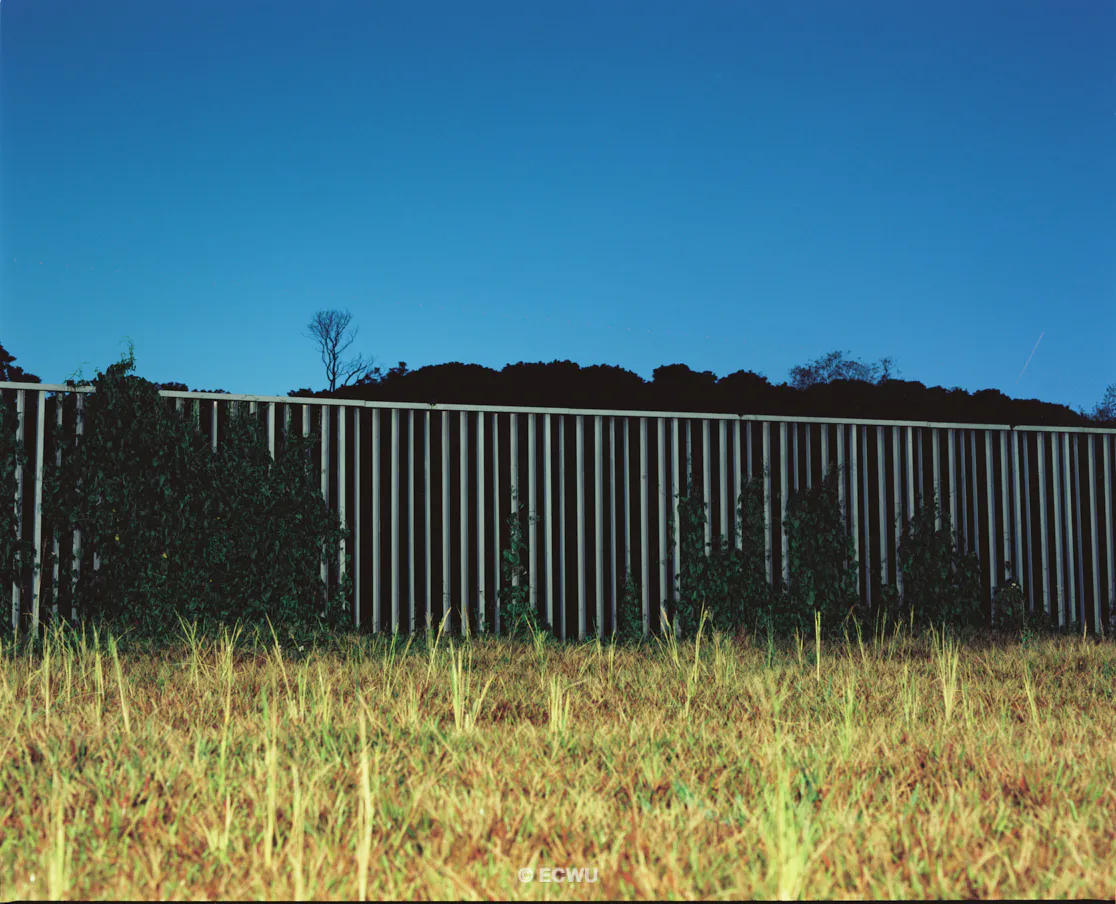
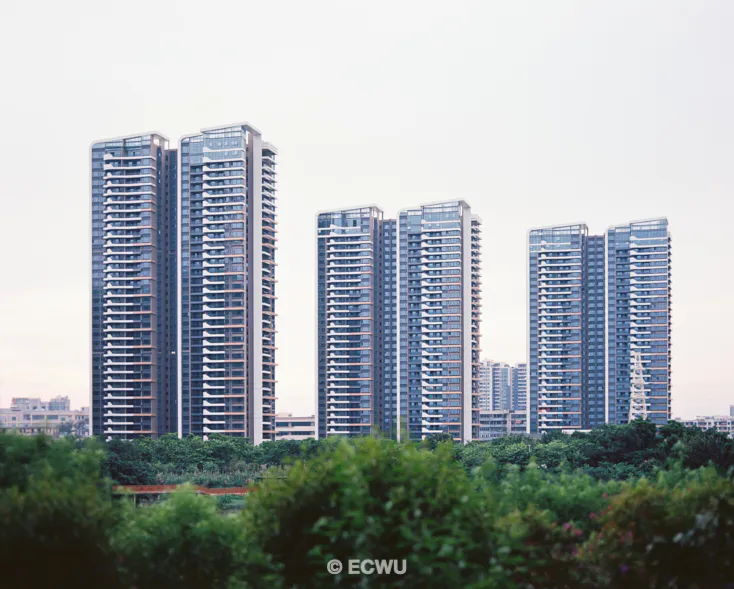
FUJICOLOR PRO160NS


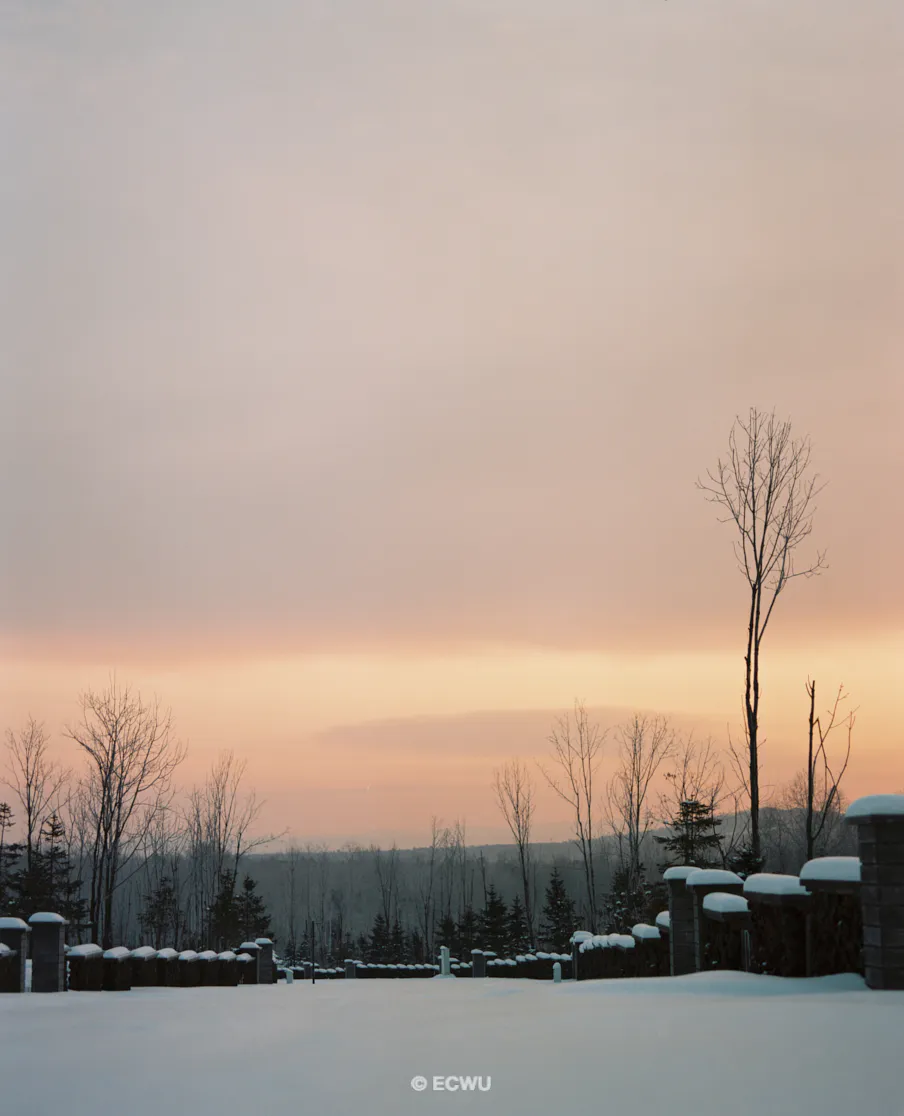
FUJICOLOR PRO400H

FUJICHROME PROVIA 100F (RDP III)

ILFORD HP5

SHANGHAI GP3
FOMAPAN 400
Epilogue
When I first tried photography, I heard a sentence: “You should take every shutter seriously”. It was a decades ago, digital cameras already became the new trend. At that time, I did not have the concept of the film, and I felt that the cost of each shutter was low. When I pressed the shutter, I had no special feelings.
But since I start with film photography. I start to take every shutter very seriously. Because each shutter press will cost money (A bit snobbery, but It is true. You have to pay for the film, develop, scan, and storage. Now each photo I take costs at least eight RMB) because I want to give meaning for each shutter pressed. I try to learn more about photography and have lots of fun.
Aside from expenses and ideas, I found that the medium of the film made me focus when I was taking photographs. First have to take care of lots of settings and knobs, doing operations step by step. But once everything is set, only need to concentrate on the picture reflect on the screen and wait for that moment and press that shutter.
“Ka-click!”
What a satisfying meditation.